There are times when you might wonder when you started using Facebook. Perhaps you even think about all the time you have spent scrolling through your timeline since you joined. That said, do you know how to see when you joined Facebook? Well, don’t worry, we have got you covered! Although Facebook settings can be confusing, we will guide you on how to see when you joined Facebook.
A Step-by-Step Guide on How To See When You Joined Facebook
The first method will feel like you’re solving a little puzzle. It will give you Sherlock Holmes vibes. Suppose you are not into the mystery-solving business. We suggest you skip to Method #2.
Method #1: Using Settings
The first method is a bit complex, but it will get you where you need to be. This tutorial is written with the Android Facebook app, and some steps might differ a bit for iPhones. So hang on to your horses, and let’s go on this journey together.
Step #1: Log In to Your Account
Log in to your account from your Facebook mobile app.
Step #2: Go to the Menu
On your Android Facebook app, you will find different icons under Facebook’s logo on the top of the screen. Click on the three-line icon. It should be the last icon on the right, but it depends on your app update.
Step #3: Find Search and Privacy Tab
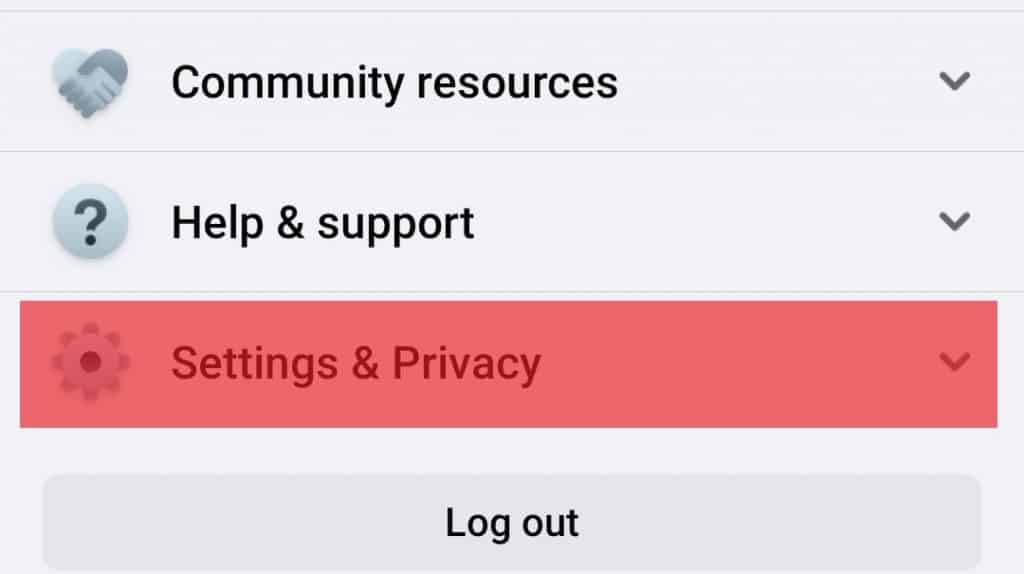
This is a menu where you will find all extra details like shortcuts, settings, and recent activity, among other things. Scroll down to the bottom, and just above the “Log Out” button, you will see a tab Settings & Privacy.
Step #4: Go to Settings
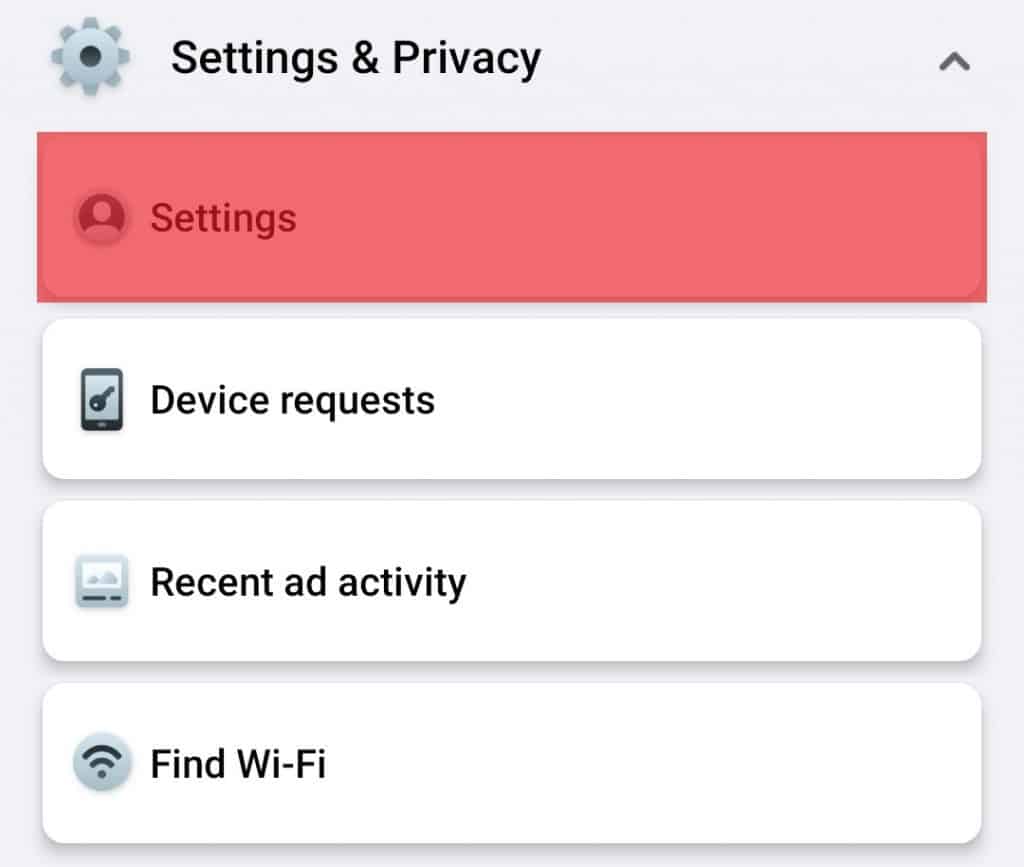
Tapping on the Settings & Privacy tab will open a drop-down list. Click on the Settings tab on the list. We realize that it seems like a maze but hang on because we are almost there.
Step #5: Go to Access Your Information
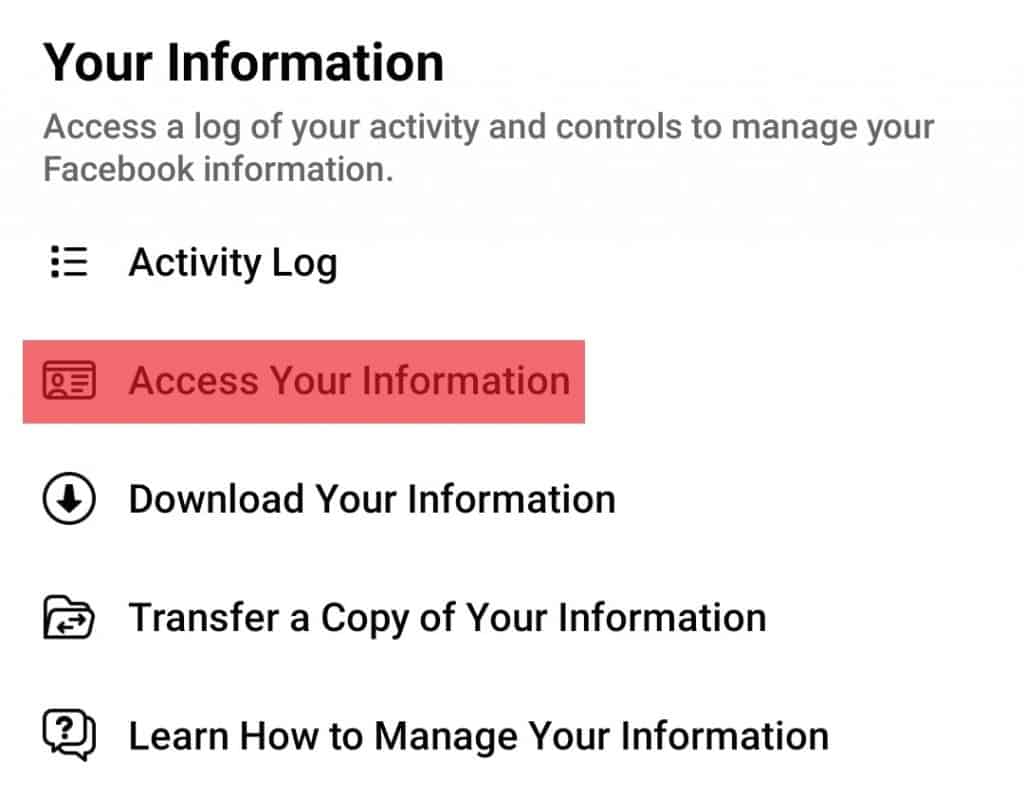
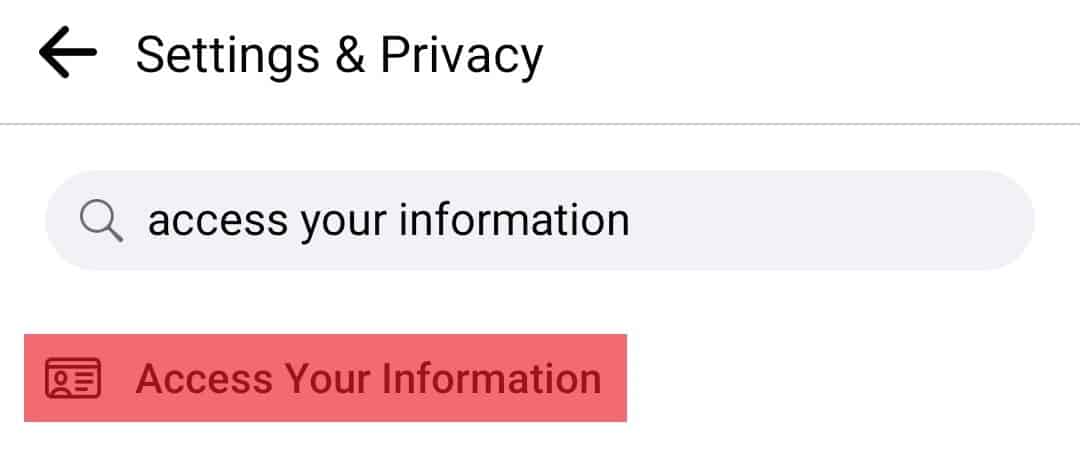
You will see several different categories of settings here. In the set of options under “Your Information,” you will see Access Your Information. Tap on it.
Step #6: Go to Personal Information
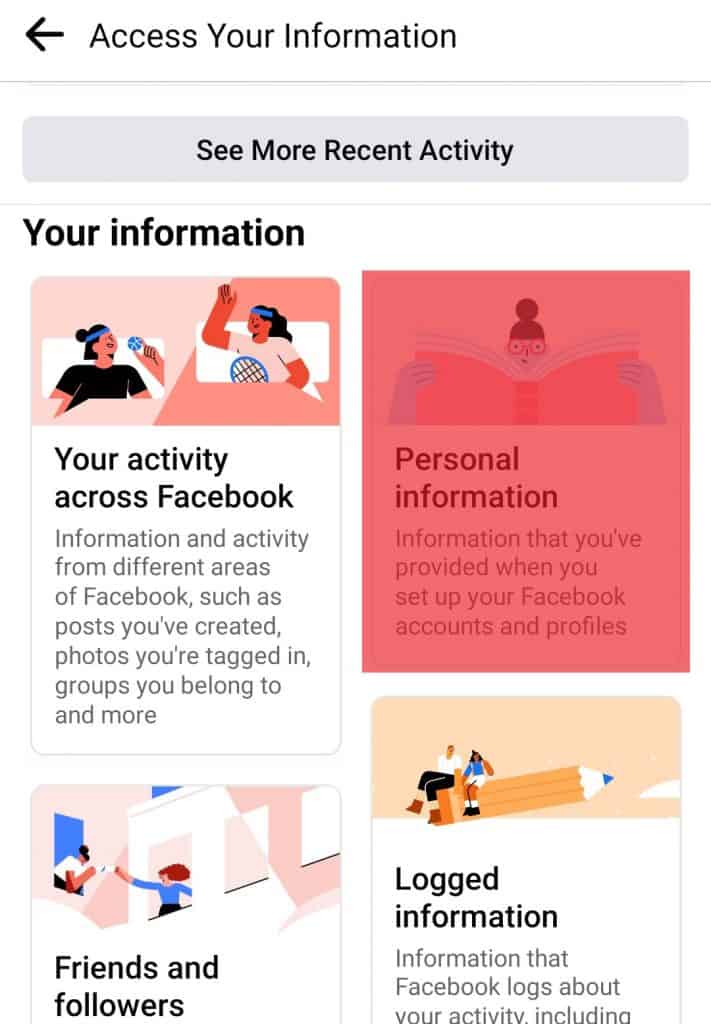
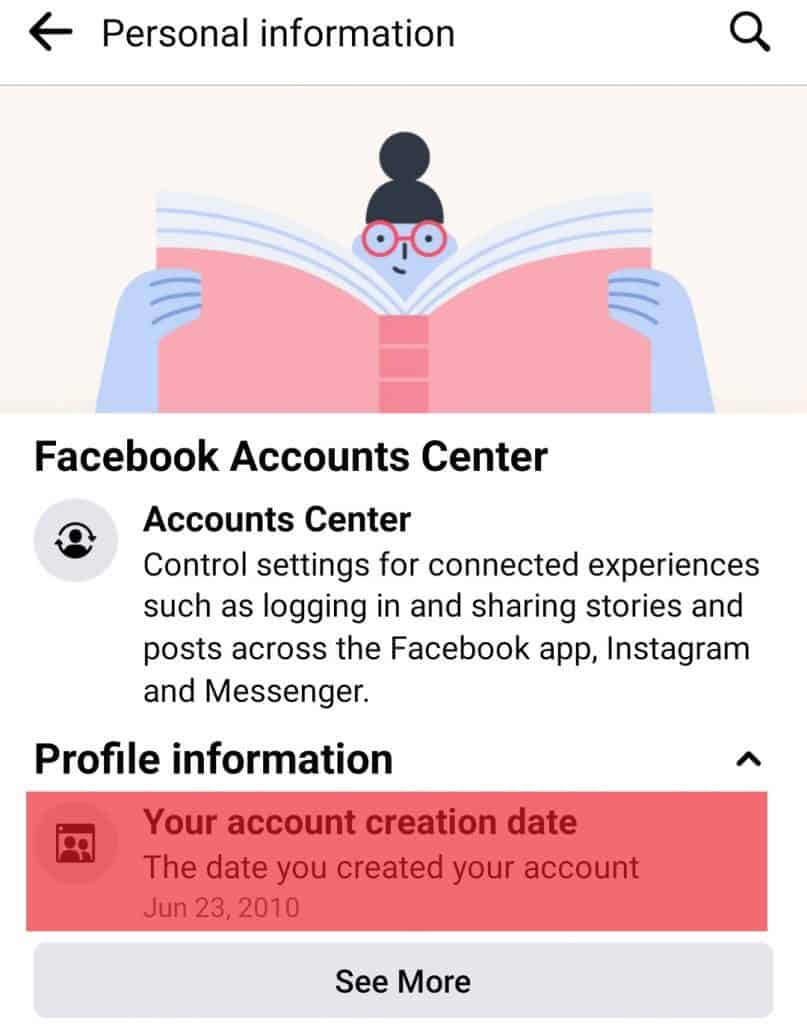
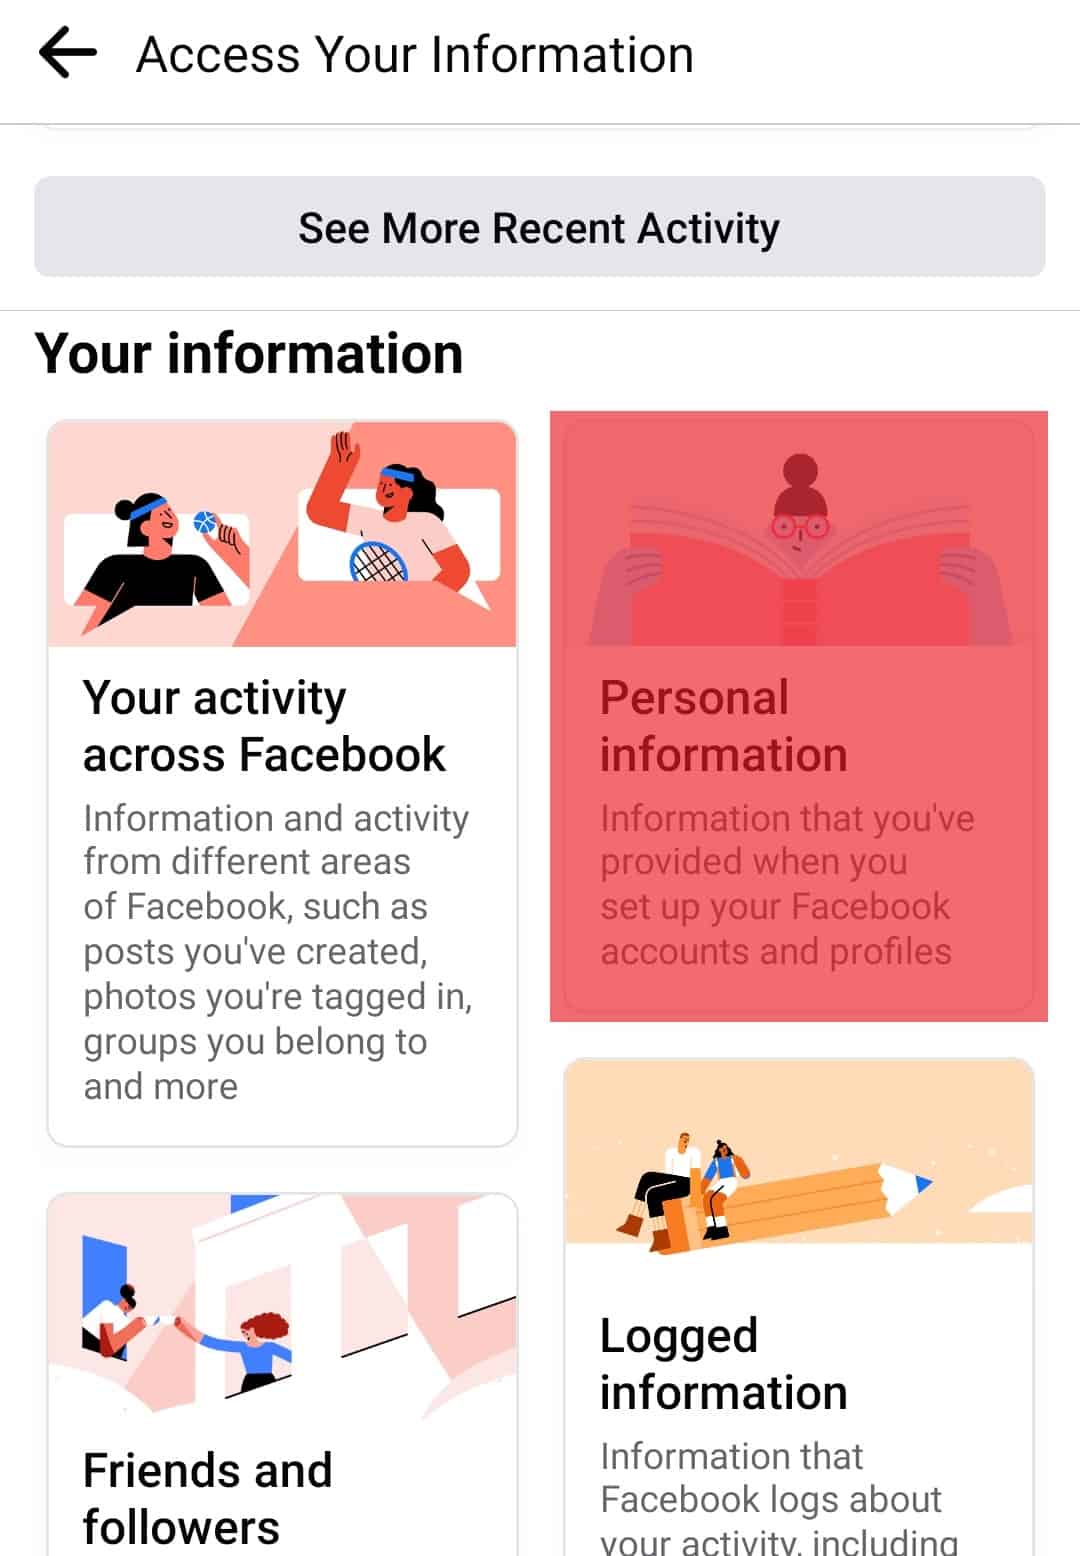
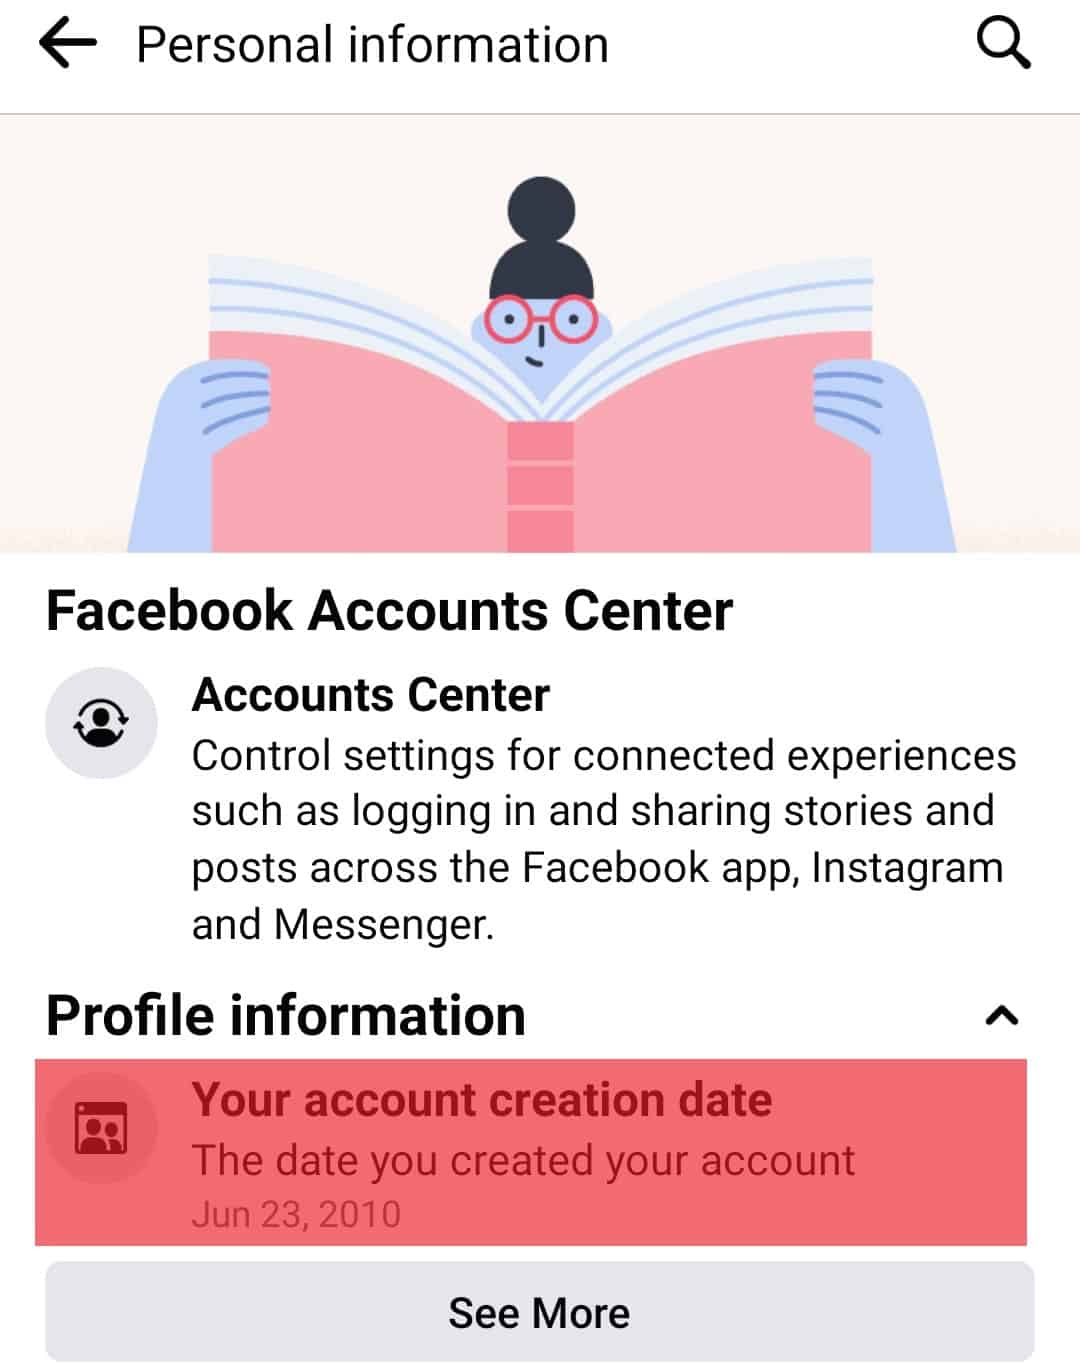
You will see some colorful images for every category here. Find Personal information, and this is where your treasure lies. You will see Your account creation date under profile information if you have the latest update.
Method #2: Using the Search Bar
Suppose you do not want to go through the topsy turvy world of Facebook settings. Let us help you avoid that trouble. This method is quite similar to the previous one but easier. Here is how to see when you joined Facebook using the search bar:
Summary
Sometimes we just have to know how much time we have invested in a relationship, project, or even Facebook. Facebook has also been in our lives for a long time now, and it is only natural to be curious about knowing when we joined. We, for one, found out we have given years of our life to Facebook. Now, that is a lot. So what are you waiting for? Go through the steps and find out how to see when you joined Facebook.
- Go to the last icon on the top right of the screen under the Facebook logo.
- Tap on the tool icon for the settings menu.
- On the top of the screen, type “delete account” in the search bar.
- Tap on the “Delete user Profile and Information” option.
- You have options to deactivate temporarily or permanently delete your account.

![]()
![]()
![]()

title: “How To See When You Joined Facebook” ShowToc: true date: “2022-12-06” author: “Amber Ward”
There are times when you might wonder when you started using Facebook. Perhaps you even think about all the time you have spent scrolling through your timeline since you joined. That said, do you know how to see when you joined Facebook? Well, don’t worry, we have got you covered! Although Facebook settings can be confusing, we will guide you on how to see when you joined Facebook.
A Step-by-Step Guide on How To See When You Joined Facebook
The first method will feel like you’re solving a little puzzle. It will give you Sherlock Holmes vibes. Suppose you are not into the mystery-solving business. We suggest you skip to Method #2.
Method #1: Using Settings
The first method is a bit complex, but it will get you where you need to be. This tutorial is written with the Android Facebook app, and some steps might differ a bit for iPhones. So hang on to your horses, and let’s go on this journey together.
Step #1: Log In to Your Account
Log in to your account from your Facebook mobile app.
Step #2: Go to the Menu
On your Android Facebook app, you will find different icons under Facebook’s logo on the top of the screen. Click on the three-line icon. It should be the last icon on the right, but it depends on your app update.
Step #3: Find Search and Privacy Tab
This is a menu where you will find all extra details like shortcuts, settings, and recent activity, among other things. Scroll down to the bottom, and just above the “Log Out” button, you will see a tab Settings & Privacy.
Step #4: Go to Settings
Tapping on the Settings & Privacy tab will open a drop-down list. Click on the Settings tab on the list. We realize that it seems like a maze but hang on because we are almost there.
Step #5: Go to Access Your Information
You will see several different categories of settings here. In the set of options under “Your Information,” you will see Access Your Information. Tap on it.
Step #6: Go to Personal Information
You will see some colorful images for every category here. Find Personal information, and this is where your treasure lies. You will see Your account creation date under profile information if you have the latest update.
Method #2: Using the Search Bar
Suppose you do not want to go through the topsy turvy world of Facebook settings. Let us help you avoid that trouble. This method is quite similar to the previous one but easier. Here is how to see when you joined Facebook using the search bar:
Summary
Sometimes we just have to know how much time we have invested in a relationship, project, or even Facebook. Facebook has also been in our lives for a long time now, and it is only natural to be curious about knowing when we joined. We, for one, found out we have given years of our life to Facebook. Now, that is a lot. So what are you waiting for? Go through the steps and find out how to see when you joined Facebook.
- Go to the last icon on the top right of the screen under the Facebook logo.
- Tap on the tool icon for the settings menu.
- On the top of the screen, type “delete account” in the search bar.
- Tap on the “Delete user Profile and Information” option.
- You have options to deactivate temporarily or permanently delete your account.

![]()


![]()
![]()


